
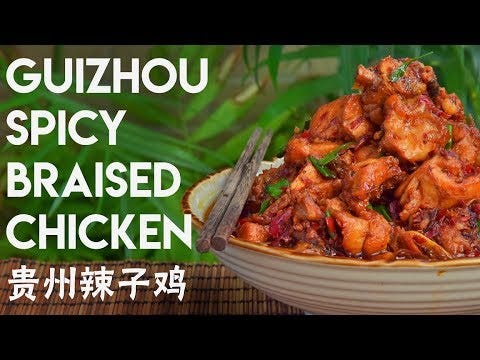

Guizhou Braised Laziji, Qinglong-style (晴隆辣子鸡)
One specific type of Braised Laziji from Qinglong the Guizhou province

Note: This Guizhou Laziji is actually from Qinglong (晴隆) - if you’re looking for the classic Guiyang-style Guizhou Laziji, this recipe unfortunately isn’t for you :)
So if you’re familiar at all with Sichuanese food, you might know the dish “Laziji” – often literally translated as ‘spicy chicken’. True to its name it’s… spicy – famously consisting of more dried chilis than chicken.
In the West, the neighboring Guizhou province might not grace menus and Yelp pages quite as much as Sichuan (or should I say “Szechuan”? God I hate Wade-Giles haha), but it’s got some awesome, boldly flavored food that can really load up on the spice. There's an old (now almost hackneyed) saying in China that, "In Sichuan they can handle spicy food; in Hunan they're not afraid of really spicy food; in Guizhou they fear food that's not spicy enough." (apologies for my shitty translation)
Even though that saying's pretty worn out in Chinese, I do think it's kind of illustrative - of all the cuisines in China, I believe that Guizhou food in the most suitable for chiliheads. And as befitting a culture that loves heat, they also have their own version of Laziji, i.e. ‘spicy chicken’.
It’s… different from the Sichuanese sort. So different that you might wonder how the hell they even share the same name. Sichuan Laziji? Fried, and get their heat from dried ‘Xiaomila’ chilis. Guizhou Laziji? Braised, and get its heat from ‘Ciba Lajiao’ – a pounded chili paste.
All in all though, this’s a great and relatively easy dish to whip up.
Ingredients
Ok, so a couple things. The super old school Guizhou Lazijis are basically (1) chicken and (2) pounded chili paste and… not much else. More modern variants tend to add chili bean paste… and I’ve even seen some recipe take it up a notch and add green Sichuan peppercorns, sweet fermented rice, etc etc.
We’ll be doing a basic modern version here, but no matter what, you need that Ciba Lajiao, Guizhou pounded chili paste. So you’ve got two options here:
Use a pre-made pounded chili paste. I uh… conveniently have a recipe for you right here haha. Now know that while that pounded chili paste is awesome, it’s… a multi-day project. And if you’re in the West, there’s basically zero fucking chance that you can buy this at a Chinese supermarket – even here in China, unless you live in Guiyang it’s not like you can get this at your local market… we have to buy it online from small workshops in Guizhou. But I always feel a twang of guilt giving you guys a recipe that, in turn, relies on another multi-day project of a recipe like Guizhou chili paste. So alternatively…
Make a quick pounded chili paste. There’s a simpler, easier way to make pounded chili. I know ‘quick and easy’ is kinda off brand for us, but this approach is common enough in Guizhou kitchens that I don’t feel bad communicating how to do it. It skips a couple steps, but definitely gets you 90% of the way there for this dish.
I’ll assume that you’re going route #2 for the below recipe, but I’ll try my best to make things reasonable to follow if you’re using a pre-made paste as well. So right – ingredients…
Chicken, 1, ~1.25kg -or- equal amount of chicken wings. Ok, so right off the bat… yes. This is one of those Chinese poultry-on-the-bone dishes. I’m a big proponent of chicken on the bone, so that’s what I used in the video (i.e. one whole chicken, cleaved across the bone). But before you close out of this tab just yet… if that feels daunting to you, just use chicken wings. It’d retain the same essence and, like, braised chicken wings are awesome. Just slice into flats/drumettes/tips, and if you’d like to go one step further… optionally cleave the flats & drumettes in half. Definitely don’t feel bad for using wings, to be honest chicken wings braise super well and I might’ve actually preferred my wing batches to my whole chicken batches…
Aromatics: 1 head garlic, ~2 inches ginger (姜), ~3 springs green garlic (蒜苗) -or- scallion (葱). Slightly smash the ginger and the cloves of garlic. Those’ll go in at the beginning of the braise. The green garlic cut into ~1.5 inch sections… those’ll finish the dish.
Oil, for frying and braising: ~2 cups, Caiziyou (菜籽油) -or- Peanut oil (花生油). This is going to feel like a lot of oil – trust that you do need a sizeable quantity to fry out a properly red base. We’ll be using ~1 to ~1.5 cups of oil in the braise (yeah that’s right), so I started with two cups for frying the chicken and then evaluated after. It’s better to overshoot than undershoot here, you can always dip out a bit of the oil later on if you feel it’s too much. In an ideal world, you’d use Chinese caiziyou, which’s a virgin rapeseed oil but… peanut works just fine.
Optional-ish: Sichuan Chili Bean Paste i.e. Pixian Doubanjiang (郫县豆瓣酱), ~3 tbsp. If you’re using the pre-made pounded chili, you don’t need this per se. But especially with the quick pounded chili paste I’ll assume you’re using here… I really would suggest it.
Water, ~500mL. For braising, a proper English pint’s worth. We’re working on a rough ratio of one part oil to about two parts water.
Seasoning: 2 tsp sugar, 1 tsp MSG (味精). No skipping the MSG this time, it’s important to balance the heat from the chilis.
Ciba Chili Paste, 175g -or- the quick version below. If you happen to have a big batch of Ciba chili paste handy, we’re using 175g… which was roughly the yield of the quick stuff below.
For the quick Ciba chili paste: 40g of any dried medium heat red chili (e.g. Guizhou Huaxi, Cayennes, Sichuan Erjingtiao, Arbols), 25g of any dried hot chili (e.g. Guizhou Zunyi Xiaomila, Sichuan Heaven Facing, Tien Tsin Chili, Piri Piri, Thai Bird’s Eye), ~3 cloves garlic, ~1 inch ginger. Ok, so I hope all these chili varieties aren’t confusing. You basically want a blend of medium and hot chilis – in Guizhou they use a mix of Huaxi chili (for color) and Zunyi Xiamila (for heat). If I was in the West, I’d probably use a combo of dried cayennes and Thai Birds Eye.
Feel free to halve this recipe too.
Process
I suppose I should really put “quick” chili paste in quotes here, because especially if you don’t own a food processor, it can really be a bit of a pain. The most sensible way to make the chili paste is either (a) doing it in said food processor or (b) using one of those massive Southeast Asian mortar set-ups.
I… don’t own a food processor, and my mortar is squarely medium-sized. So for the pounding step, I either did two separate batches in the mortar (which sucks, because it takes like ~15 minutes to pound pone batch from scratch) or pulsed in a blender then finished in the mortar (which sucks less but you need to scrape down the sides of the blender like a comedic number of times).
Anyway, more on that later. If you have a food processor though your life’s golden.
Reconstitute your dried chilis in hot, boiled water for at least 1 hour or up to overnight. Be sure to cover the bowl of chilis/water to speed up the process. Or alternatively, use the Kenji method of nuking the chilis together with water in the microwave for ~5 minute intervals. I believe he wrote about that method in his Chili con Carne article.
Give the chilis, garlic, and ginger a rough slice to get started. Slightly wring out the chilis – you don’t have to go too crazy though because we do want a touch of that moisture. Slicing these at first makes things easier to pound – cut the chilis into about half inch sections. This is the garlic and ginger quantities under the ‘for the quick Ciba chili paste” btw – i.e. the 3 cloves plus the ~1 inch.
Pound the chilis/garlic/ginger in a mortar -or- use a food processor -or- pulse then finish by pounding. So however you want to crack this nut. We want something that looks basically like this in the end. This took us about ~15 minutes of pounding straight up in the mortar or about ~5 minutes if I gave it a quick pulse first.
Prep the rest of the ingredients: reserve the chili paste, lightly smash the garlic, smash the ginger, cut the green garlic/scallion into ~1.5 inch sections. Just smash the garlic open is fine – I love munching on garlic in a braise. For the green garlic, in an ideal would slice down into the green garlic at a 45 degree angle – that cut is call ‘horse ear cut’… it’s basically just for looks but is the most proper way to cut green garlic.
Over max flame fry the chicken with the ~2 cups of oil in two batches – until golden brown, ~5 minutes for each batch. Get your oil up to a blistering 200 celcius over max flame and drop in half of your chicken. It’s going to really be flirting with crowding the wok... it’s fine, for this type of thing you don’t need to be paranoid (we’ll be braising this after all). Getting to golden took about ~5 minutes for us. Take it out, do your second batch of chicken, and reserve.
Evaluate the oil. Again, we want about one to 1.5 cups of oil in there. And again, it’s better to overshoot than undershoot here – you’ll likely lose some of the oil from deep-frying the chicken, thus the two cups originally.
Over medium flame, fry the garlic and the ginger until fragrant, ~1 minute. Get the oil up til its bubbling around a pair of chopsticks and drop in the garlic and ginger. Fry until it smells real nice.
Lower the flame to low, and add in the chili paste. Fry and stir for ~3 minutes, or until the oil is stained obviously red. Like frying chili bean paste, low heat helps bring out the color – high heat has a nasty tendency to slightly scorch the chilis.
Add in the chili bean paste, fry for ~2 more minutes. Then add in the chicken and mix.
Add the liquid – bring to a boil then down to a simmer, then cover with the lid ajar. If you’re using one of those super-not-airtight wok lids like us you can just cover – those still allow for reduction.
Simmer for ~1.5 hours on low, until ~90% reduced. After 1.5 hours, your chicken should be good and tender so now you can evaluate the consistency of your braise. Is it too oily? Very possible, especially if you went with the 1.5 cups. Just skim and dip out some of the oil – you can reserve it, it makes for a great chili oil substitute. On the other end, it’s very possible that it’s still too watery and didn’t quite reduce enough yet. In that case, uncover and swap the flame to high to finish the reduction.
Season with sugar and MSG, add in the white part of the green garlic, cook for ~1 minute, add in the green parts, mix. And that’s it! If you opted to not use the Sichuan chili bean paste, season with salt to taste too – I’d start out with ~1 tsp and then work from there.