


Rice Cookers: a Guide
How to buy, how to use. A hopefully comprehensive-ish look.

Click to jump to the eight simple, one-person rice cooker recipes
We should probably get this out of the way at first: should we even bother to have rice cookers?
In the above video, I make the case why anyone seriously interested in Chinese cuisines — or East Asian, generally — likely should. To briefly summarize: yes, rice can indeed be cooked on the stovetop. It’s not overly difficult, and it can make perfectly great rice. But you can also equally easily toast things in an oven, or re-heat your leftovers by steaming them. We add toasters and microwaves to make our life easier.
And, therefore, if you (1) enjoy white rice and (2) enjoy making your life easier, a rice cooker can be a worthwhile purchase. It’s automatically perfect rice, and frees up your brain to focus on other tasks. But if you do not like white rice, or if you do not like making your life easier, there’s certainly no imperative need to go out and purchase one.
With that out of the way now, in this post we want to specifically zero in on rice cooker recommendations, and how to use them.
“Okay fine, what rice cooker should I buy?”
The anti-rice cooker crowd online lists a few big ‘pain points’ for rice cookers:
They can be expensive
They take up a lot of space on the counter
They’re annoying to wash (??)
In order to side-step these potential pain points, our recommended introductory rice cooker is something like this:
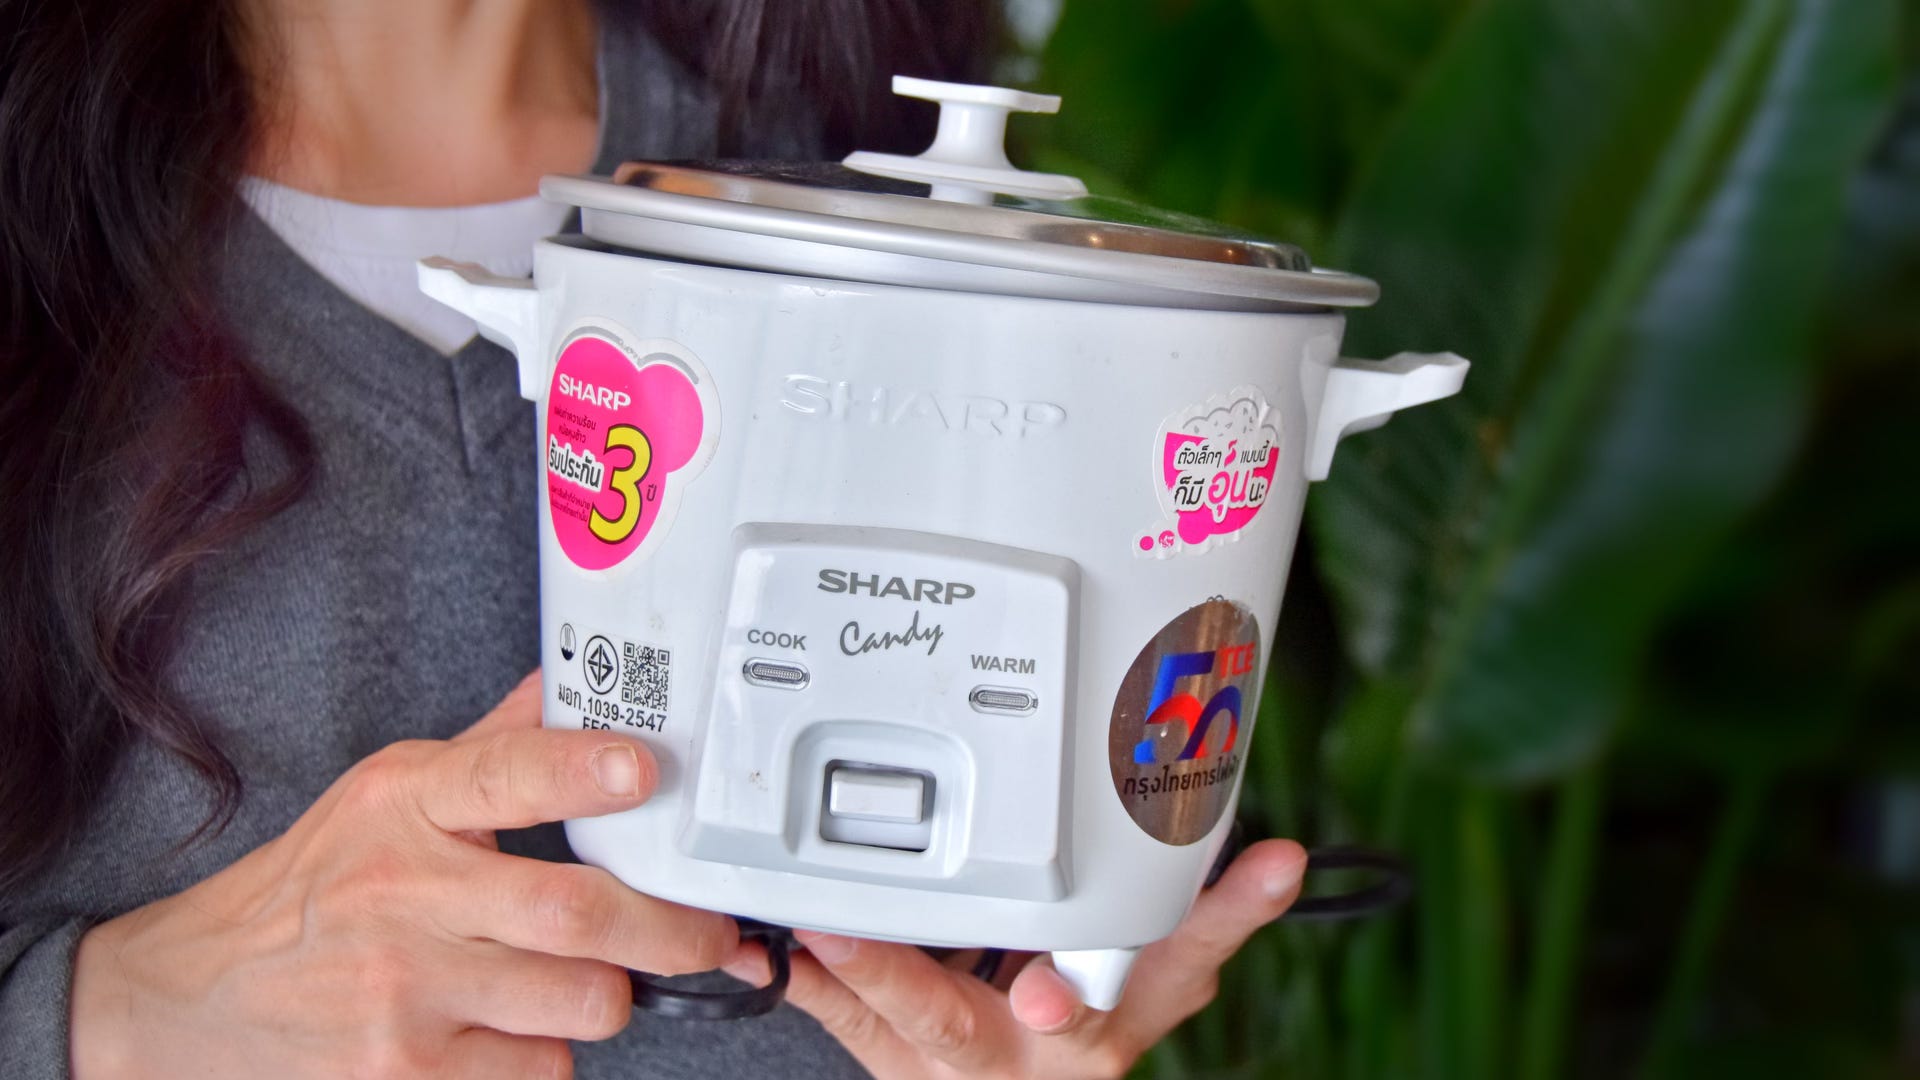
This is our everyday, workhorse rice cooker. It’s a mini-rice cooker, standing at 300mL.
It has a removable pot with a lid, so it’s not any more difficult to clean than any other pot. While I do think the ‘difficult to wash’ complaint is seriously overblown, I suppose it’s true that a rice cooker with an attached lid will need cleaning every once in a while. And if you use a steaming basket insert, that would obviously need to be cleaned as well.
This rice cooker… has none of that stuff. It’s a dirt cheap rice cooker that does what it says on the tin. You put water in, you put rice in, you press button. Rice is cooked.
Lastly, it’s very, very small. It stands about 12 centimeters tall, with a 14 centimeter diameter. It’s like… the size of a large bowl. It’s about a third of the size of our blender.
We purchased ours in Thailand, but something like this appears to be roughly the same thing. I should be crystal clear that the aforemented link is not an endorsement, an advertisement, or an affiliate link. I have no idea if this specific brand is good or not — maybe the thing’ll come in the mail and spontaneously ignite like it’s a Cybertruck. And if you’re reading from the future and said link is broken, just search “mini rice cooker” and after a bit of scrolling you should be able to find something (500mL or less).
“What if I want something bigger than the mini-rice cooker?”
Definitely get something bigger, in that case. A mini rice cooker is a perfect size for 1-2 people — we’re two people, so it’s fantastic. We usually fill ours up ¾ of the way, but with particularly rice-heavy meals we’ll do it to the full amount.
If you’re feeding a family, however, you’ll probably want something a little larger. We would recommend something like this or this1, depending on the size or your family.
If you would like to batch prep your rice, a larger rice cooker can also make a great deal of sense. Sometimes I know I’m going to want to have rice for a week straight for lunch, and this is when we reach for our larger rice cooker. We’ll make a larger portion, toss it in a Tupperware. To reheat, just portion out the amount you want in a bowl, sprinkle a little water on, cover, and microwave on medium high for about a minute and a half.
“How do I use a basic, standard rice cooker?”
Your rice cooker will come with a little cup. You scoop out as many little cups of white rice as you want to eat, and then add that to the bowl of your rice cooker. Quickly rinse off the rice to remove some of the surface starch2.
You will see little numbered lines on the side of the rice cooker. Pour enough water to get to the relevant line – e.g. if you used three of your little rice cooker cups, you pour enough water to get to line number “three”. You do not need to do the knuckle trick — this is for stovetop rice, not rice cookers.
You then place the pot into the rice cooker, cover with a lid, and press the “on” button. After about 25 minutes, the rice will be done.
Open, and fluff up the rice with a pair of chopsticks.
“Wait a tic. This sounds like one of those dreaded kitchen unitaskers. Unitaskers are against my religion. Anything else can I do with this?”
At its core, you… don’t do anything else with this. It’s a machine that makes rice — just because we all love and respect Alton Brown doesn’t mean we need to join him in his unitasker zealotry.
Of course, that’s definitely a simplification — there’s loads of ‘rice cooker recipes’ you can find online. But I would posit that almost any ‘rice cooker recipe’ can be made more deliciously (and often more easily) using alternative tools. Rice cooker hacks are quite popular on the Chinese internet, often because college students will have a rice cooker in their dorm and that’s it.


That said, I think there is one thing that the rice cooker does function quite well as: a makeshift steamer. And with a makeshift steamer… you can functionally make a very easy one person meal. When you’re making your rice, look for this moment when the steam is beginning to billow out:
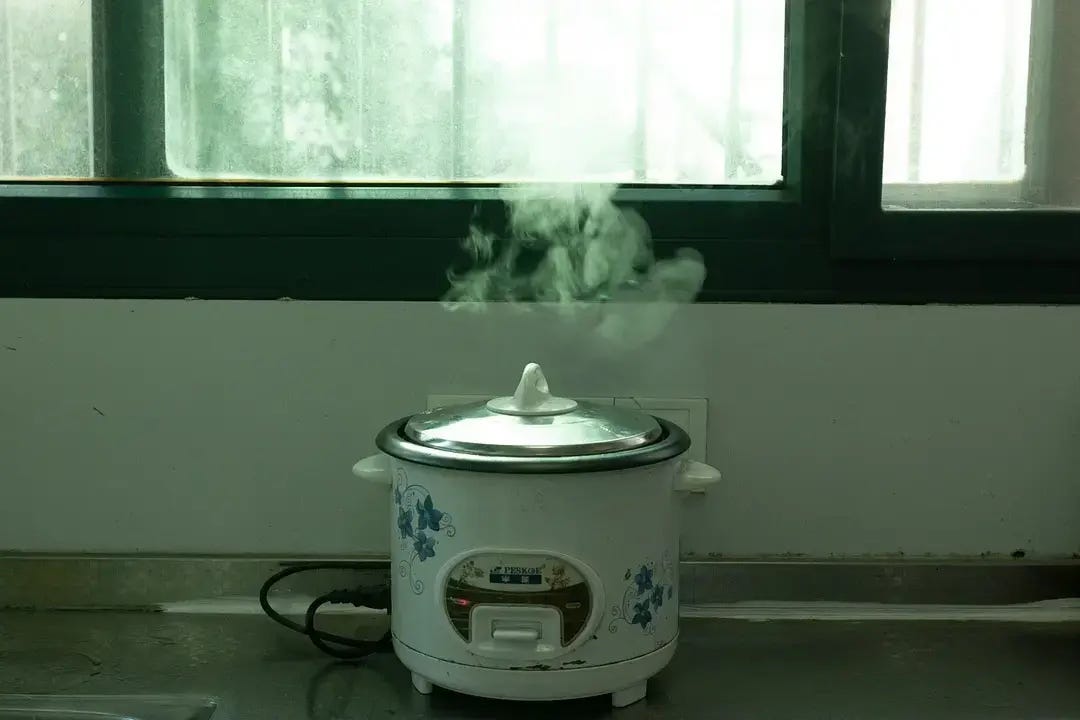
…and that’s when you hit it with some ingredients you want to steam. At the end of this post, we’ll have a small collection of recipes for full, one person meals that you can make in your rice cooker.
“But… I’m a person with a handsome degree of disposable income. If I’m going to buy something, I want top of the line. I should get the best Zojirushi rice cooker money can buy, right?”
If you truly have money to burn, yes, get this Zojirushi rice cooker. Ours is one notch cheaper, the NS-LBH05C, and also a great machine (the fancier one above has induction heating elements that also work the sides). But if you do, just promise me in advance that you won’t complain on Reddit about the cost of the thing if it ends up collecting dust.
Why is a Zojirushi (or similar brand like Tiger) so expensive? Well… it makes really good rice. It gets that way through an extended soaking, cooking, and steaming process that takes a bit over double the time as a normal rice cooker does. The end result is better than restaurant rice: it’s soft and tender, but still incredibly sticky.
But… how can I put this gently?
Unless you’ve grown up in a rice-eating culture, your tastes probably aren’t discerning enough for the premium to be worth it. If you read the previous paragraph and said to yourself “wait why should rice be sticky again?”… seriously, don’t bother. I’m truly not trying to be a snob – there’s no intrinsic benefit to having expensive tastes. You don’t need to drop the cash on microbrews if Budweiser makes you equally happy.
Still, the rice is so good that even its microwaved leftovers are roughly restaurant quality. So if you’ve got ambitions to batch things and you have cash to burn, that could indeed be a potential selling point of the Zoji even if you’re not exactly a Jiro. And yet, even though the leftovers are fantastic, there’s also something quite important to note: on its default settings — the leftovers can actually be too good.
With standard Zojirushi rice, the leftover rice loses fried rice optionality.
Because one of the very best things to make with a bunch of leftover rice in your fridge is, of course, fried rice. While we’ve talked before about why steamed rice is (and historically was) the most highly valued rice for fried rice… leftover rice behaves in many of the same ways. It’s dryer, looser, and can make a for a great fried rice. Zoji leftovers, however, are neither dry nor loose.
If you have a Zoji and you want that fried rice optionality, what you have to do is select the ‘quick’ function — this function forces the Zojirushi to act like a normal rice cooker. For us personally, we found ourselves using this setting even more than using the ‘standard’ rice (it also has the benefit of being, well, quicker), which is why the above mini guy became our workhorse machine.
“But the Zojirushi also has all of these other functions. It can make congee! What do you think of these functions?”
Some of the functions are really quite nice, which is why the machine is still relevant to us personally. These are the functions on our Zojirushi:
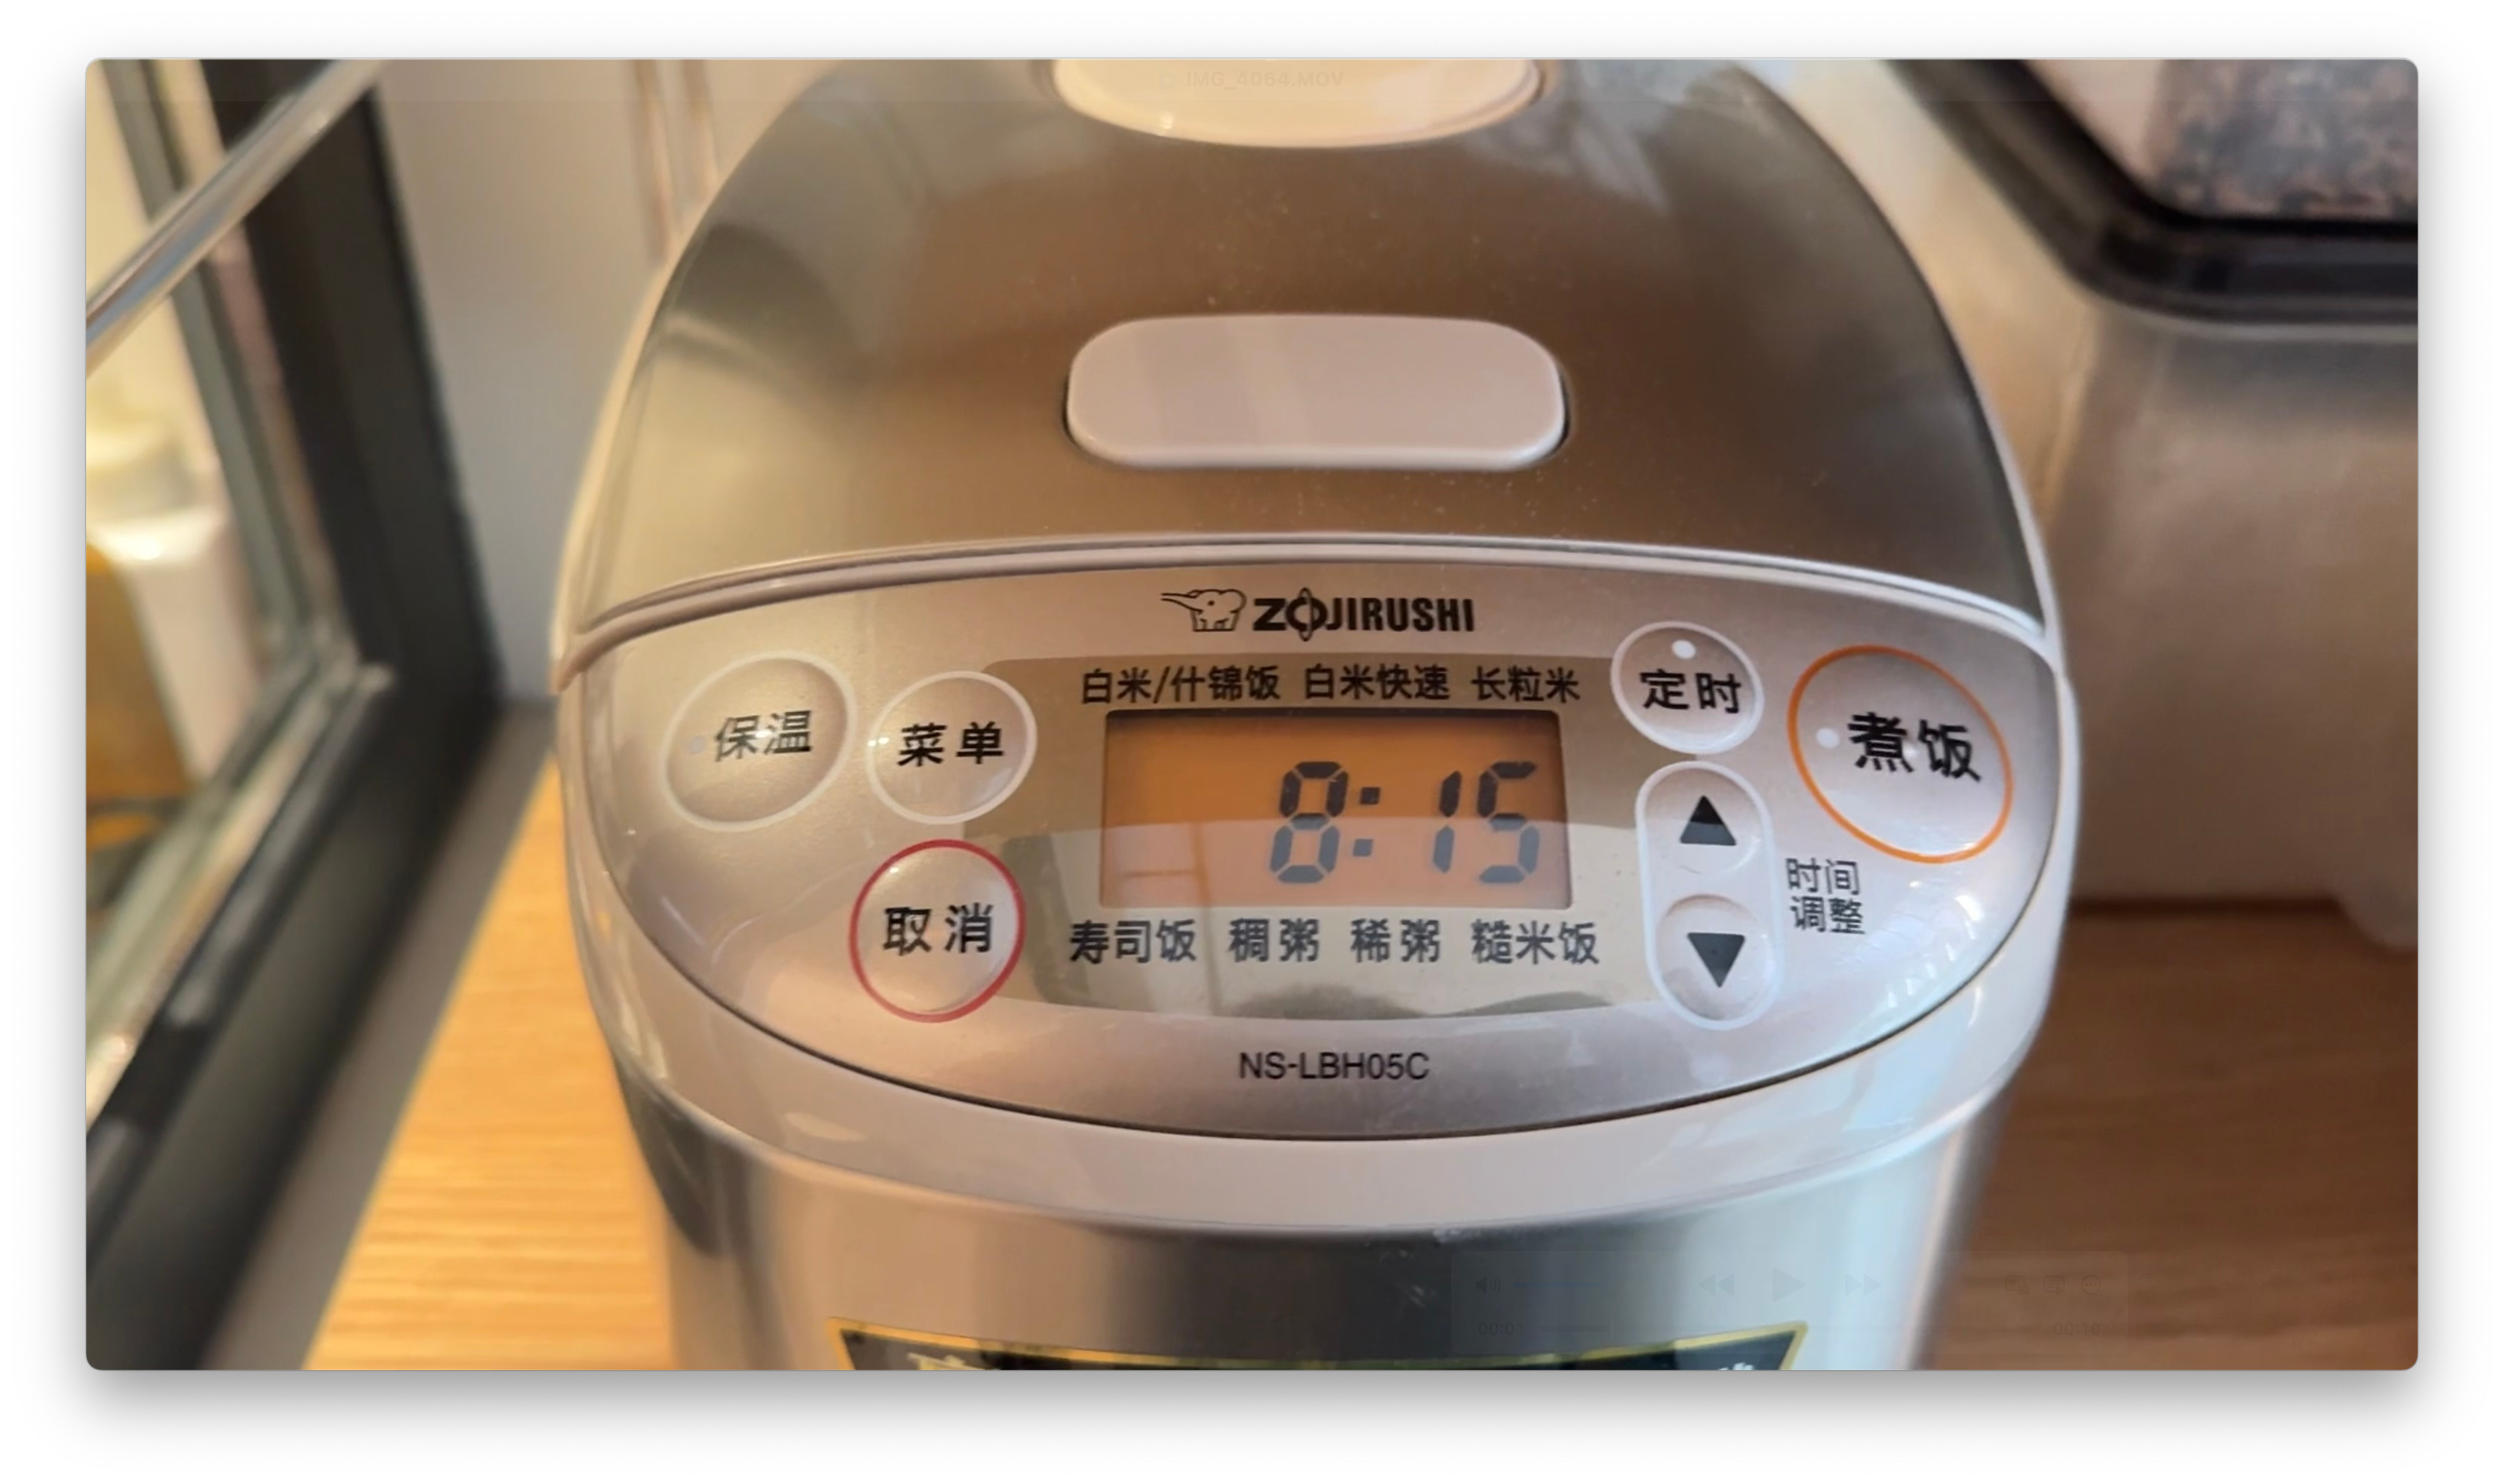
From left to right: standard rice, quick rice, long-grain rice, sushi rice, thick congee, thin congee, brown rice.
We discussed the ‘quick rice’ and ‘standard rice’ functions above. To reiterate, ‘quick rice’ means “standard rice cooker rice” and ‘standard rice’ means “awesome Zojirushi rice”.
Sushi rice: This, to me, is the killer feature of a fancy Japanese rice cooker. If you want to make sushi, onigiri, or any sort of Chinese fantuan… this is your magic button.
It might not get you to that omakase level sushi rice, but it’ll definitely match the rolls you can find at an izakaya (or, in a Chinese context, a good breakfast shop). You find a nice Japanese rice — or a sushi rice, or a Northeastern rice, if you’re China-based — pop it in, and follow the ratios the machine tells you.
Done. Grab some salmon and impress your friends.
Brown rice: I grew up hating brown rice. Texturally, it was always weirdly… hard, but (like a lot of parents) my family reached for it because it was ostensibly ‘healthier’.
Most western recipes for brown rice basically follow the approach of “boil the fuck out of the thing for like a half hour”, which ‘works’ as well as anything ‘works’. The Chinese technique (and presumably Japanese too, though I’d need to check my math on that) is a bit different.
The goal should be to soften the hard outer shell of the rice without cooking it so hard that the whole enterprise bursts. The way you can do this is first get hot, boiled water from the kettle, and give the rice a soak for about 1-2 hours beforehand. Then you can charge forward however you like, whether rice cooker or stovetop.
The brown rice function works much the same way. It takes a while – about two hours. But if you’ve only ever made brown rice according to the commonly seen western methods, it will make better brown rice than you’re used to.
You can also use the same function for purple rice, which I personally prefer over brown rice.
Long grain rice: We have never used this function. Note that if you are using Jasmine rice, you should not use the ‘long grain rice’ function — despite how Jasmine is categorized in English, you should use ‘standard’ or ‘quick’. Presumably, this function is for Indian rices like Basmati, but for those rice I have always used the par-boil and steam method in the Indian style.
Thin/thick congee: We personally are Cantonese congee snobs. Shunde — our old home — is famous for making some of the best congee in the country, so… we’ve gotten spoiled. We’ve covered this kind of awesome Cantonese style congee before, but again, I do want to emphasize that there’s no benefit to having picky tastes. I’m truly not trying to dust off my shoulders here — there’s people out there that are perfectly happy with rice cooker congee, and that’s great for them. But personally, we’re deeply unimpressed with what comes out of the ‘thick congee’ setting.
With that said though, I do think that the ‘thin congee’ can work quite well. For us, we like to use this setting when making Teochew meals (and, by extension, Central Thai). In said corner of the country, many meals are centered not around white rice, but rather a thin, loose congee called mue (糜) — often paired with salty preserves such as the Chinese black olive.
The stuff can be a little bit of an acquired taste — lots of foreigners in China aren’t exactly the biggest fans. I personally fell in love with it living in Bangkok, where it’s seen in Thai-Chinese cuisine — called Khao Tom Kui (ข้าวต้มกุ๊ย) in Thai. The (frankly rather plain) porridge just seems to go… fantastic next to Bangkok dishes, especially so on a muggy subtropical night. So my personal suggestion would be to pair next to stuff like:
Olive Pork (หนำเลียบหมูสับ)
Thai Pork Omelette (ไข่เจียวหมูสับ)
Wingbean Salad (ยำถั่วพู)
Shrimp Cakes (ทอดมันกุ้ง)
Nam Prik Pao Fried Clams (หอยลายผัดน้ำพริกเผา)
Some of these would be considered more classic (e.g. Olive Pork) than others (e.g. Wingbean salad). Just my personal preference — you can also check this out for a more complete/culturally accurate list of recipe (in Thai, but Google Translate does a solid job).
“I’m looking at an expensive Chinese rice cooker from Midea actually, and it’s got all these crazy functions. ‘New Orleans Chicken Wing’ mode? What’re these about?”
These days, Japanese rice cookers aren’t the only name in the high end rice cooker game. Call it New Quality Productive Forces, I guess.
Some of these rice cookers are practically Instapots (I mean, some even have pressure cooker functions). The thing to understand about most of these extra modes is that they’re really trying to adapt to the reality of the Chinese kitchen. In the west, when it comes to heating elements, most people have (1) a stove and (2) an oven. In China, most people own (1) a stove and (2) a rice cooker. And because rice cookers heat slow and evenly, it’s not too difficult for the product to incorporate some oven-like and slow-cooker type functions into the mix.
The other day, me and Steph biked over to our local Walmart and snapped some pictures of the rice cooker-functions on offer:


These are some of the alternative functions, from roughly the most common to the least common (do note that some of these we haven’t used personally):
Steaming (蒸): As we discussed above (and below), rice cookers can function as makeshift steamers – so much so that many of them contain steaming racks inside. This is a function that allows the thing to steam stuff without the rice inside. Works well, though I would personally rather use the stove — however, this could be a handy function for some people.
Soup (煲汤): Toss ingredients in, works as a slow-cooker works a soup. A pretty well regarded function, but it obviously means that your rice cooker is out of service until dinner. Because most rice cookers are smaller than slow-cookers, I personally think this would be most relevant for 1-2 people dinners.
Braises (焖炖): Similar idea as the soup function, though I imagine this would go at a somewhat higher heat. There’s no reason why this wouldn’t be solid, though like a slow-cooker you’d probably want to fry your ingredients beforehand for maximally delicious results. And for me personally, at that point I would rather just use the stove. But I could imagine others organizing their mise in a way that it could be helpful to them.
Mixed Grain Congees (杂粮粥): Mixed grain congees could be kind of thought of as the Chinese equivalent of brown rice — something that was traditionally consumed by the poor, and now is a big deal in the whole-grain-health-food crowd. It’s basically congee with stuff like oats, barley, millet, and beans added to the mix. Mixed grain congees have less textural demands than, say, the Cantonese congees discussed above, so this could potentially be a nice function if you enjoy Mixed Grain congee.
Claypot Rice (煲仔饭): I am deeply suspicious of this function, and I heavily doubt it can make for a good Cantonese claypot rice texture. My guess is that it will simply heat the bottom/sides of the pot in order to get that crispy gouba (socarrat), but that’s only half the claypot rice story. Still, we’ve never tried it, and perhaps I’m overly picky and cynical.
“Low Sugar” Rice (低糖饭): A newer function that is sort of supposed to mimic the parboil-and-steam method of rice making that we outlined here. We’ve seen it advertised in Chinese workout circles — I’m really quite skeptical it’s actually ‘low sugar’, but hey. If it can nail that parboil-and-steam texture, it might just make for really good fried rice.
Cake (蛋糕): I’m really not sure when this function was added to rice cookers. I suspect it might have been around COVID times, when everyone was locked inside, bored, and had to cook for themselves. In the USA, people made sourdough bread. In China, it was spongey cakes — often, in rice cookers. In my opinion, there is no reason to bake a cake in a rice cooker if you have an oven.
Bread (面包): I really don’t think this would work any better than an oven.
Roast Chicken Wings (烤鸡翅): Ditto, but compared to cakes and bread I’m much more open to the possibility of tasty results.
This is by no means an exhaustive list, but it should cover some of the more common alternative functions3.
One person Rice Cooker Recipes
The below recipes have a very strong Cantonese focus, because when it comes to that sort of one person ‘fuck it’ rice cooker meal… Cantonese cuisine is much more in our wheelhouse.
Steamed White Fermented Tofu with Hard Boiled Egg and Baby Bok Choy (腐乳送饭)
Steamed white fermented tofu is a classic Cantonese ‘rice killer’ to eat alongside and flavor your rice. To make this a complete meal, we also added an egg for some protein and blanched baby boy choy on the side.
Thoroughly rinse
100g white rice, such as Jasmine
and add water to the requisite line. Begin cooking your rice.
Rinse
1 egg
and set aside. To a very small plate, add:
1-2 cubes of white fermented tofu (腐乳)
¼ tsp sugar
½ tsp toasted sesame oil
Drizzling the sugar and sesame oil over the fermented tofu. When steamer is beginning to billow out steam, nestle both the plate and the egg inside.
While cooking, slice
250g baby boy choy
into quarters and boil with
¼ tsp salt
1 tsp oil
Remove, drain, and serve the vegetable next to oyster sauce to dip.
Fried Dace with Black Bean, with Blanced Lettuce (豆豉鲮鱼送饭)
Fried dace with Black Bean is a classic Cantonese ingredient, and also a quintessential rice killer.
Thoroughly rinse
100g white rice, such as Jasmine
and add water to the requisite line. Begin cooking your rice.
Roughly chop together
One fried fish from a can of Fried Dace with Black Bean
1 tbsp Black Bean from said can
Once rice is billowing steam, add the chopped fish and black bean. Sprinkle over
½ inch ginger, julienned
¼ tsp sugar
⅛ tsp MSG
While cooking, boil
200g lettuce
with
¼ tsp salt
1 tsp oil
Lettuce will be cooked almost immediately. Drain well, then drizzle over
1/2 tbsp soy sauce
1/2 tbsp oil from the Fried Dace with Black Bean can
If you have deep fried garlic handy, this could also be a nice addition sprinkled over the lettuce or the rice.
Ginger & Scallion Chicken Rice (姜葱鸡饭)
This is a flavored rice, which means that some of our ingredients will be added in the beginning of cooking.
Dice
1 boneless chicken thigh (roughly 160g)
into ½ inch (2cm) cubes. Then marinate with
¼ tsp salt
¼ tsp sugar
⅛ tsp MSG or chicken powder
⅛ tsp white pepper
¼ tsp soy sauce
⅛ tsp dark soy sauce
1 tsp oyster sauce
¼ tsp liaojiu, aka Shaoxing wine
2 tsp cornstarch
Mix well, finally coat with
½ tbsp peanut oil
While the chicken is marinating, make the ginger and scallion sauce. Mince:
1 inch ginger (or roughly 10-12g)
1 sprig scallion (roughly 15g)
separating the white part and the green part of the scallion. In a wok, swirl in:
2 tbsp oil
and fry the ginger and scallion white together on low until it starts to smell fragrant. Add in the scallion green, fry until it slightly wilted but not yet golden. Remove from heat and mix in
¼ tsp salt
½ tsp sugar
⅛ tsp MSG
1 tsp soy sauce
Mix well and set aside.
Thoroughly rinse
100g white rice, such as Jasmine
and add water to the requisite line. Mix half of the ginger scallion oil into the rice and water and begin cooking.
Then the steam begins to bubble, open and layer the chicken evenly on top of the rice.
Once finished, do not open until 5 minutes after cooking. Open, mix in the remaining of the ginger and scallion sauce.
Peas and Salt Pork Flavored Rice (豌豆咸肉饭)
This is also a flavored rice, leaning on Jiangnan-style salt pork (咸肉). We assumed you would not be able to find this sort of Chinese salt pork, so instead, we’ve substituted it with Italian Pancetta. Simply replace the pancetta in the recipe with a fatty salt pork if that ingredient is available to you.
Boil
80g fresh or frozen peas
for 1 minute (if fresh) or 2 minutes (if frozen). Strain well.
Slice
50g pancetta
into 1cm cubes4.
Thoroughly rinse
100g white rice, such as Jasmine
and mix with the peas and pancetta. Also mix in:
¼ tsp salt
⅛ tsp chicken powder
add 10% less water than your rice cooker calls for, as peas will release a little moisture when cooking.
Steamed Eggs with Minced Pork (肉沫蒸蛋)
Equipment needed: a somewhat larger rice cooker than our recommended ‘mini-rice cooker’, ideally with a steaming insert.
In a bowl, mix
80g minced pork
⅛ tsp salt
⅛ tsp sugar
⅛ tsp white pepper
¼ tsp soy sauce
¼ tsp liaojiu, aka Shaoxing wine
for ~2 minutes until somewhat sticky. Then mix in:
¼ tsp oil
and set aside.
In wide bowl or deep plate, thoroughly whisk together
2 eggs
6 tbsp water
¼ tsp salt
¼ tsp sugar
⅛ tsp white pepper -or- white vinegar
½ tsp toasted sesame oil
and roughly mix the pork in with the egg.
Place the egg and pork mixture in the rice cooker as the water is heating up and before bubbling as egg needs a bit longer to steam.
Once ready, take out, drizzle on
½ tsp soy sauce
½ tsp toasted sesame oil
A bit of chopped scallion
Steamed Eggplant with Garlic Sauce (凉拌茄子)
Equipment needed: a somewhat larger rice cooker than our recommended ‘mini-rice cooker’, ideally with a steaming insert.
Cut off the tip of
1 eggplant (roughly 500g), preferably the Asian type
and cut lengthwise into 8 strips, then cut in half in the other direction.
Toss with
⅛ tsp salt
¼ tsp white vinegar
a spread out evenly on a plate. Then, thoroughly rinse
100g white rice, such as Jasmine
and add water to the requisite line. Place the eggplant onto the steamer insert and cook the rice and eggplant. While the rice is cooking, prep the sauce.
In a bowl, mix:
⅛ tsp salt
¼ tsp sugar
⅛ tsp MSG
1 tsp soy sauce
½ tsp Dark Chinese vinegar
½ tsp toasted sesame oil
½ toasted chili flakes
2 big cloves of garlic, minced
1 sprig of cilantro, minced
½ tsp toasted sesame seeds (optional)
When rice is finished, remove the eggplant. Mash with a spoon or fork until paste-like, and mix in the prepared sauce.
Cantonese-style Pork Belly with Salted Fish (咸鱼蒸花腩)
This dish uses Cantonese style salted fish, something along these lines. These should be available at your local Chinese supermarket.
Equipment needed: a somewhat larger rice cooker than our recommended ‘mini-rice cooker’, ideally with a steaming insert.
Thinly slice
175g skinless pork belly
into rough 1.5” pieces, then mix with:
1/8 tsp salt
½ tsp sugar
½ tsp cornstarch
½ tsp soy sauce
¼ tsp liaojiu, aka Shaoxing wine
½ inch ginger, cut into thin strips
Mix well, then coat with
½ tbsp peanut or neutral oil
Spreading it evenly on a plate. Slice
30g salted fish
into ½” bits, and sprinkle on top of the pork. Set aside.
Thoroughly rinse
100g white rice, such as Jasmine
adding water to the requisite line. Cook.
Once steam is billowing out, add the pork and fish to the steamer insert. Once finished, do not open until 5 minutes after cooking.
Cantonese-style Steamed Fish Slices (清蒸鱼片)
Equipment needed: a somewhat larger rice cooker than our recommended ‘mini-rice cooker’, ideally with a steaming insert.
Slice into ½ cm sheets:
150g fish fillet
and mix with
⅛ tsp salt, 1/4 tsp
⅛ tsp sugar, 1/4 tsp
⅛ tsp white pepper powder
½ tsp liaojiu a.k.a. Shaoxing wine
¾ tsp cornstarch (生粉)
Julienne:
1 cm ginger
2 scallions
separating the white part and the green part of the scallion. Mix the white part of the scallion with the fish, together with
½ tbsp peanut oil
and sprinkle the ginger on a plate. Set aside.
Thoroughly rinse
100g white rice, such as Jasmine
adding water to the requisite line. Cook. Add the plate of fish to the steamer once the steam is beginning to billow out.
Once finished, remove the plate of fish and sprinkle the scallion greens on top. In a small pot over a high flame, heat
1 tbsp peanut oil
until smoking. Drizzle over the fish.
Same deal, not a recommendation or an affiliate link, just linking something on Amazon that I think could fit the bill. I’m not familiar with this specific brand. And again, in case of a broken link, we’re looking at a basic rice cooker like above — albeit in the 1.5L-4L range.
This will also clean off any potential bugs or residual pesticides. Or, alternatively — because I know rinsing rice is apparently controversial advice on the English language internet these days — you can also do whatever the hell you want. We’re not your mom.
In the process, we also found this Midea, which I think has an interesting list of functions. If we didn’t already have a Zojirushi, we might have even been a bit tempted by it.
In addition to some of the more practical functions… it also allows you to select alternative rice types: the Japanese-like Northeastern rice, a very fancy Northeastern rice called Wuchang Rice, Thai Jasmine rice, and the Cantonese Simiao rice. It also allows you to specify your desired rice texture – soft, chewy, and sticky, as well as letting you choose whether the pot should form crispy rice (i.e. socarrat, 锅巴) on the bottom or not. Just a really smart mix that seems quite relevant for Chinese cooking.
I would still recommend Japanese rice cookers over something like this, simply because they’ve built their reputation over the decades for a good reason. But if someone knows someone that works at Midea, we’d happily test it out for everyone…
If you would like to render out a bit of fat from the pancetta, you can briefly fry it beforehand. Adding a clove of minced garlic near the end of frying can also be a nice idea.
I bought one for 34 €, with a steaming basket. It only has two options: on and off 🤣. Works perfectly well.
No love for the Korean brands? Haha
But I digress, I remember when I was shopping for my rice cooker a few years ago, and I was seeing the ones that could do both pressurized and non-pressurized modes as they lead to different tastes.
I know at least in Korea, you can actually but replacement inner pots if you scratch your coating.